drawing and playdough
A little girl in a white shirt stands in front of a yellow background and smiles.

Drawing supports hand skills

Even toddlers express their creativity by scribbling on paper. Little by little, simple lines become figures with arms and legs. Drawing lets children express themselves freely and in the moment. Through their pictures, they process what they see, feel, and experience. At the same time, they develop fine motor skills that support them later in learning to write. Starting school often reveals that many children struggle to draw a simple house and sun or write basic letters. One possible reason is that their hand coordination is not yet developed enough. When kids draw or do crafts, they use their fingers in a completely different way than when they tap or swipe on a screen. They grasp, press, cut, insert, shape, fold or glue. Such movements prepare children's hands for fine motor tasks at school. That’s why it is beneficial for children to have regular opportunities to use pencils and scissors. A small art corner with simple supplies invites them to craft freely and strengthens hand coordination. If space is limited, a basket keeps everything within easy reach for creative moments at the kitchen or living room table. After all, preschoolers love to draw and play close to their parents. When ideas run out, Mom or Dad simply draws along for a little while. And then things get going again on their own. The drawings are displayed on the fridge or a pinboard and inspire new pictures. However, not every child enjoys drawing. Building blocks, modeling clay, or small craft projects also support fine motor skills and offer a valuable alternative. Varied movement and fine motor experiences in early childhood prepare children well for learning to write.
A preschool child is playing the guitar at home.

Drawing is creativity

At preschool age, drawing is an important preparation for writing. It enables children to visualize and express their thoughts. Drawing merges fantasy and reality, allowing children to bring their ideas to life creatively. This encourages imagination and concentration. Children learn how to use pencils, scissors and glue and develop fine motor skills that will make writing at school easier later on. Drawing allows children to express their creativity, feelings, thoughts and experiences. It promotes a sense of color harmony and a differentiated perception of shapes. Over time, children recognize ever finer details in their surroundings, such as the many shades and shapes of clouds. Drawing lays the foundation for lifelong creative skills and encourages creative thinking. Using colored pencils, crayons and other drawing tools, children expand their creativity by creating their own pictures on blackboards or outside in the courtyard. There is no ›better‹ or ›worse‹ when it comes to drawing. What is important is the joy of creating independently. Bear in mind that children are often sensitive to evaluation if their efforts are not appreciated or criticized. Ask questions such as »Tell me about your picture?« instead of »What is it?«. By doing this, you show interest in your child's creative thoughts and further promote their language development. Attach a line from wall to wall in the child's room at eye level so that you hang up the pictures and admire the artwork together. If your child shows less interest in painting, encourage them to engage in activities like paper folding or playing with playdough. These also promote creativity as well as dexterity and hand coordination.
Girl takes a sharpened pencil from her mother’s hands.
Shape

This is how I sharpen my pencil

Many children enjoy coloring with pencils. But the tips often break off, or the picture gets smudged when they erase. With a little practice, children learn to sharpen pencils on their own and erase properly. Check the pencil tips together and show your child how to use and empty a container sharpener. Ask questions like »Where do you empty the sharpener when it’s full?« to encourage independent thinking. If the sharpener doesn’t have a container, it’s best to collect the leftovers in a small cup and empty it later. Also show your child how to erase gently: »Hold the paper with two fingers and press only lightly when you erase. That keeps the paper nice and smooth. Then blow away the crumbs so your picture doesn’t smudge.« These small steps build confidence in their own abilities. Especially during the first weeks of school, it helps when children know how to handle their drawing tools independently.
A smiling boy with curly hair against a yellow background.

Learning to draw and write in a relaxed way

Good fine motor skills help children learn to write more easily when they start school. Through regular drawing, crafting, painting, and modeling with playdough, they develop finger coordination in a playful way. In the process, they learn to use their thumb, index, and middle finger to perform precise movements. Even light pressure is enough to draw fine lines or circles. Over time, the pencil glides more smoothly across the paper. This helps children write small letters and numbers with a relaxed hand when they begin school.
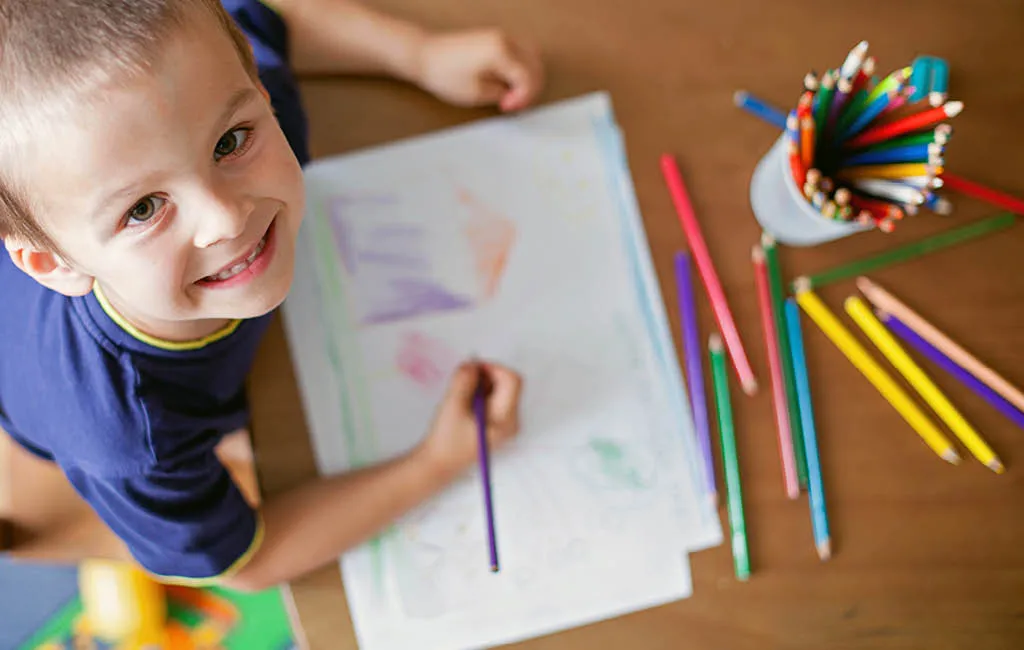
A child draws with a colored pencil at home.

Drawing supports a relaxed pencil grip

Holding the pencil in a relaxed manner is a basic fine motor skill that makes drawing and later writing at school much easier. Fine motor skills that are well developed, together with the ability to coordinate eye and hand, help children guide a pencil with ease and write letters neatly. The correct pencil grip develops gradually and is usually well established by the age of about five. To prepare children for the demands of school and develop their dexterity, it is important to provide them with pencils, paper and coloring books as early as kindergarten age. Thick colored pencils or wax crayons are helpful because they are easier to grip and support the development of a relaxed pencil grip. The correct pencil position enables the children to draw for a long time. A grip using three fingers of the hand is recommended, where the thumb holds the pencil on one side while the index and middle fingers support it on the other. The hand and forearm rest on the writing surface. Encourage your child to hold the pencil loosely and to draw without applying pressure. Applying too much pressure on the paper with the pencil, coupled with a cramped grip, often leads to quick hand fatigue. Some children have difficulty holding the pencil correctly. For these children, there are ergonomically shaped pencils or grip aids that have been specially developed to improve the correct hand position. Before starting school, it is crucial to recognize signs of complex finger and hand dexterity impairments. These often manifest themselves in difficulties closing buttons, tying shoes, cutting out circles, putting puzzle pieces together or grasping small objects. Occupational therapy offers valuable support in identifying the exact causes and implementing targeted measures to improve the child's fine motor skills, ensuring the process of learning to write goes smoothly.
Colorful children's table with chair for drawing and crafting in the play area.

Set up a drawing corner

A small drawing corner with colored pencils, wax pastels and plenty of white paper offers children from around the age of three an easy way to explore their creativity. The smallest hand and finger movements develop along the way. Blank paper in particular stimulates children to express their own ideas freely. Pictures with outlines give children little room to use their imagination. Encourage your child to draw freely to build more trust in their imagination. Children learn more easily when they picture things in their mind. The best approach is to keep the materials visible on an open shelf rather than hidden away in a drawer. When children see the materials, they are more likely to use them. I still clearly remember my son's preschool years. Sometimes our living room looked pretty chaotic, with piles of drawings and scribbles that had built up everywhere. Every two weeks, we sorted everything together and put the drawings away in a box. Not long after, the whole thing started all over again. Looking back, he never had any trouble learning to write, and his imagination greatly supported his learning at school. More suggestions for a creative space are waiting for you in the Play area.
A smiling boy in a striped shirt against a blue background.

Playdough supports fine motor skills

In addition to painting, cutting and crafting, playdough also supports fine motor skills by improving hand and finger movement. For children who don’t enjoy drawing or painting, playdough offers a helpful alternative. Strengthening these skills before school starts gives children a smoother start with learning to write, thanks to more relaxed hand movements.
A child kneads an animal figure out of clay.

Creative with playdough

Children love crafting colorful fantasy figures and animals with playdough. This activity is a wonderful way to pass the time and builds confidence in their own abilities. When children shape and create with playdough, they develop their creativity and their own ideas. The activity keeps them engaged for longer, because changes remain possible at any time. Through modeling, children unleash creativity and develop their own ideas by using their imagination. The motivation to knead is maintained over a longer period because corrections are always possible. Children often begin without a specific idea, spontaneously kneading, pressing, rolling and shaping. Quite incidentally, a certain character develops with their help of her imagination. The child begins to think about the shape and plan its form. Step into your child's fantasy world by asking them about their creations. Together, find a special place at home to display the playdough creations. This shows your child how much you enjoy their ideas and imagination. Encourage your child to create a playdough figure as a personal gift for a family member, for example for a birthday. Occasionally, take some time to knead together with your child. Such moments strengthen family ties and leave lasting positive memories.
A little girl is playing with colorful dough.

Playdough recipe

Making playdough from natural ingredients is an inexpensive way to encourage fine motor skills and creativity. Although the playdough is made from natural ingredients, it is important to ensure, especially with small children, that the playdough is not suitable for consumption. Place a protective cover, such as an oilcloth, on the table to make it easier to remove crumbs after kneading.
Ingredients:
  • 400 g flour
  • 200 g salt
  • 2 tbsp oil
  • 500 ml water
  • 30 g of baking powder
  • Food coloring
  • Airtight plastic container
Preparation of the dry ingredients:
Sift the flour into a bowl. Add salt and baking powder. Mix all the dry ingredients with a spoon.
Add the oil and water:
Add the oil to the dry ingredients. The oil ensures that the dough is smooth. Boil the water and our the hot water slowly and carefully into the bowl. Use a hand mixer to blend all ingredients well. Allow the dough to cool slightly until it is warm to the touch.
Knead:
Then knead the dough by hand on the work surface until a smooth mass is formed.
Adjust the consistency:
If the dough is too sticky, mix in some more flour. If the dough is too dry and cannot be shaped easily, add a little more water. The water helps to bind the dry ingredients better. A few drops of oil will also help to make the dough smoother and easier to knead. Make sure that the dough does not become too firm or too sticky. Otherwise children will quickly lose the joy of kneading.
Add color:
Divide the smooth dough into individual portions according to the number of colors. Make a small indentation in the center of each portion with your thumb. Wear gloves to protect your hands from discoloration. Add a few drops of food coloring to each well. The more food coloring you add to the dough, the more intense the color will be. Knead each portion vigorously so that the color is evenly distributed. Shape the dough into balls and let it rest for a few minutes so that the playdough achieves the right consistency.
Storage:
Store the playdough in an airtight container in the refrigerator so that it stays soft for several weeks. For longer storage, the playdough can also be frozen. To do this, divide the modeling clay into small portions so that only the required amount can be removed later.
Shape

Forming with natural beeswax

Modeling beeswax is a meaningful alternative to conventional modeling clay. It’s made from beeswax, vegetable oils and natural pigments. It comes in bright colors and also in the natural color of beeswax. Ideally, the wax is sourced from responsible beekeeping. Modeling beeswax made from 100% natural ingredients is especially gentle on the skin. Unlike regular modeling clay, beeswax doesn’t dry out. Once warmed and kneaded by the hands, the wax takes on a soft, smooth consistency. Children feel the warmth and enjoy the gentle scent of beeswax. So modeling beeswax supports creativity with warmth, fragrance, and a soft, touchable texture.
Arrow icon upDollar icon